Can’t Delete Partitions Using Disk Management / Use DISKPART Elevated Command

There is plenty of space on the disk. You are getting this error for a different reason. If your machine is anything but a desktop then you would get the error you have.

https://technet.microsoft.com/library/354e5163-f388-4354-984c-ea4e4206694c

You aren’t able to delete the recovery partition because it EFI protected. You should be able to force by using the override command.

https://technet.microsoft.com/en-us/library/cc766465(v=ws.10).aspx

I would try using diskpart (from an elevated command prompt) to delete the partition and convert to dynamic disk.

DISKPART> list disk
DISKPART> select disk 4

Disk 4 is now the selected disk.

DISKPART> list partition

Partition ### Type Size Offset
————- —————- ——- ——-
Partition 1 Primary 223 GB 1024 KB
Partition 3 Recovery 450 MB 223 GB

DISKPART> select partition 3

Partition 3 is now the selected partition.

DISKPART> delete partition override

DiskPart successfully deleted the selected partition.

DISKPART> list partition

Partition ### Type Size Offset
————- —————- ——- ——-
Partition 1 Primary 223 GB 1024 KB

Posted in Computers, Laptop/Notebook, Windows

Apple Support Scam on the Rise “Scammers, don’t let them gain access to your computer remotely or to your account information”.

Here are 5 phone numbers that called me within 1 hour.  The people are scammers trying to gain account information from you to steal money.  Please report all these calls to the Federal Government.   Above all, don’t let them gain access to your computer or your account information.

901.808.6897    Scammer

901.250.0220    Scammer

901.329.1742     Scammer

901.250.0524    Scammer

901.610.5663     Scammer

901.359.3738     Scammer


Posted in Apple, Cell Phones, Fraud, MAC, Security, Virus/Malware

Iphone XR Hotspot Not Compatible With Windows 10 Version 1809 or 1903 Drivers

Recently I had two clients both complaining that their IPhone Hotspots would not connect to the internet on a Toshiba and a Lenovo Laptop running Windows 10 Version 1809 and 1903.  The weird thing was that they were both on different carriers AT&T and Verizon.  I thought at first that it was a carrier problem, but quickly found that not only could I not get internet connection from the wireless card, but even the ethernet failed to gain DNS.  I removed the drivers that were installed for both the wireless and ethernet; seems the Iphone XR when adding device drivers somehow corrupted the Windows drivers for both controllers.  I reinstalled the Windows 10 drivers, renewed and verified that both wireless and ethernet were working again, and installed the Update for Windows 10 Version 1909 from November.  I connected the Iphone 10 XR back to the computer and was able to connect to the wireless and ethernet, receive DNS, and connect to the internet.

By the way, these were not USB connections to the IPhone, they were both connected via Bluetooth.  I have no clue why it corrupted all network drivers, I just know how I was able to fix it.


Another HP laptop today.  This repair fixed it.

Posted in Apple, Cell Phones, Computers, Drivers, Hardware, Laptop/Notebook, Windows 10

Can’t See C Drive in Server 2012 Raid 1 Solved

I have managed to resolve this.  The update wrote over my raid drivers.

– I downloaded the necessary drivers from the manufacturer site.

– Copied them over to the Windows Server 2012 USB drive.

– Launched installation, and chose system image recovery.

– Of course there was no image found but I was able to choose advanced and load the drivers to get one more option: Continue to Server           2012.

-Nowthat I can see the drives, I backed up and chose Command Prompt.

-I looked at diskpart and list volume.

-I navigated to (in my case the C drive was listed as E) : e:\Windows\System32\config

cd e:\windows\system32\config

rename default default_old

rename sam sam_old

rename security security_old

rename software software_old

rename system system_old

cd regback

copy default e:windows\system32\config

copy sam e:windows\system32\config

copy security e:windows\system32\config

copy software e:windows\system32\config

copy system e:windows\system32\config

Exit and restart and then goto services.msc at login and disable Windows Updates

This allowed to me to view all the drives. And in turn I was able to resolve my original ‘Windows update boot loop’ problem.

!!!!!Replace the drive letter with whatever driver letter you see in list volume!!!!!!

Posted in Computers, Drivers, Hardware, Server, Software, Windows

How do I Delete the SearchMine Search Engine from Google Chrome on my MacBook Pro

  1. Click the “Preferences” icon in your Mac’s menu bar and select “Profiles”.
  2. Select all “AdminPrefs” profile(s) and delete it/them by clicking the minus (-) icon at the bottom.
Once you’ve removed the unwanted “adminprefs” profile(s), you should be able to follow these steps:
  1. Open the Terminal app (Go > Utilities > Terminal or press Command+Space and search Terminal)
  2. Enter the commands below and hit the Enter key after each one:
    • defaults write com.google.Chrome HomepageIsNewTabPage -bool false
    • defaults write com.google.Chrome NewTabPageLocation -string “https://www.google.com/”
    • defaults write com.google.Chrome HomepageLocation -string “https://www.google.com/”
    • defaults delete com.google.Chrome DefaultSearchProviderSearchURL
    • defaults delete com.google.Chrome DefaultSearchProviderNewTabURL
    • defaults delete com.google.Chrome DefaultSearchProviderName
Now restart Chrome and the issue should be resolved. If not, you may need to restart your Mac.
Posted in Apple, Computers, Google Chrome, MAC, Virus/Malware

Add User in Windows 10 Home, Run netplwiz, Then Raise the User to Administrator

To Add a Local Account in netplwiz

1. Press the Win+R keys to open Run, type netplwiz into Run, and click/tap on OK to open it.2. Check the Users must enter a user name and password to use this computer box, and click/tap on the Add button. (see screenshot below)

Add Local Account or Microsoft Account in Windows 10-add__account_netplwiz-1.png
Posted in Computers, Software, Windows, Windows 10

Hyper-V not booting Server 2016 Stays Black Dell PowerEdge R730

In my case I tried everything Microsoft Community suggested.  I even tried reloading my Operating System but my VM still would not start up.  All my processes were there but I couldn’t see the screen and I couldn’t reach it on the network.  Believe me I tried Everything.  Then I thought what the hell, maybe it’s a driver.  I went to Dell, signed in and got the ChipSet Driver from their support site, loaded the driver and everything worked.   Have no clue why but three days of research and trying everything led me to a decision that fixed my problem.  I knew my files were fine, I had no errors, only my VM not starting up.

One suggestion told me to wait it out, it may be doing a check disk prior to Windows starting up.  I waited 10 hours.  I didn’t have anymore time so I added the drivers and everything was great.  Just thought this may save someone else hours of waiting and no change.

Posted in Computers, Drivers, Hardware, Hyper-V, Server, Server 2016, Software

Can’t Send or Receive AT&T and Bellsouth Email From Computers using Outlook 2016 Yahoo Servers Solved:

It seems I have had several clients calling me and telling me that they cannot receive or send email from their computers using Outlook 2016.  I did some research because I know that in Gmail and Yahoo, you can go to the security and privacy settings to check the box to allow Less Secure Apps to use various versions of Outlook.  Well with AT&T and Bellsouth emails – Yahoo Mail does not have the setting.  It doesn’t exit anywhere that I could find.  After my research I found the way to fix the problem because AT&T provided a tool that takes you to a page that does not exist.

!st      / Go to this AT&T url: https://www.att.com/olam/passthroughAction.myworld?actionType=ViewProfile

2nd   / Login using your User ID and Password, then goto account info page.  You will see  Secure mail key
You may have to create a secure mail key to access your AT&T email with some email applications.

3rd   /Instructions are as follows:

INSTRUCTIONS & INFO

AT&T email app security to update soon

Act now to avoid email hiccups

Do you use a desktop program or a mobile app to access and manage your AT&T email? If so, we suggest you use one with Open Authentication (OAuth) technology, which encrypts your username and password. Learn about OAuth and find out if your app uses OAuth.

If your email program or app doesn’t have OAuth technology, it will only be able to access your AT&T email program or app using a 16-character secure mail key. Be sure to use myAT&T to create a secure mail key for each of your AT&T email addresses and subaccounts, so you can continue to:

  • Access your AT&T email with your favorite email apps
  • Synchronize other account info, such as your calendar and contacts, to your email app


Create a secure mail key

Learn how to create a secure mail key from your mobile device, tablet, or computer.
Have your User ID and password ready to sign in to myAT&T.

  1. Go to Profile > Sign-in info.
  2. Select the email account that you want to get a secure mail key for. (You’ll find a drop-down menu at the top if you have multiple accounts.)
  3. Scroll to Secure mail key and select Manage secure mail key.
  4. If you have more than one email address, select the one you want to use.
  5. Select Add secure mail key.
  6. Enter a nickname for the secure mail key to make it easier to recognize.
  7. Select Create secure mail key.
  8. Select Copy secure mail key to clipboard. (Jot down your secure mail key, so you have it handy if you have to update an email app on several devices.)

o    For security purposes, the secure mail key only shows until you select OK.

o    If you lose or forget the secure mail key, you can create new secure mail keys as needed.

  1. Select OK.
  2. Go to your preferred email app and replace the existing password with your secure mail key. (For an IMAP account, delete the existing password for both the IMAP and SMTP servers and replace them with your secure mail key.)


Additional secure mail key notes

Learn how to switch to an OAuth email app and avoid secure mail keys
For step-by-step instructions to set up or update your email account in several popular email apps, use our Troubleshoot & Resolve Tool.

Review email apps on all your devices
Check the email apps you use on each of your devices to see if they use OAuth technology. If they don’t, we suggest you switch to an OAuth email app. Otherwise, you’ll have to set up a secure mail key to use with your non-OAuth email apps. Learn more about OAuth email apps

Get one secure mail key for each email address
Every AT&T email address, including each subaccount, must have its own secure mail key if you want to use it with an email app that isn’t OAuth compatible.

Access your AT&T email account without an OAuth mail app or secure mail key
You can always read and manage your email through a Web browser at att.net. Use your AT&T email and password.

Remember that a secure mail key won’t affect your AT&T email password
You’ll still use the same password you currently use for your AT&T email account in OAuth-compatible apps, myAT&T, other AT&T products like att.net and webmail. And, when you change your AT&T email password, you won’t need to get a new secure mail key.

Keep your secure mail key as long as you like
Secure mail keys never expire.

Create a new secure mail key for a blocked or locked account
For safety reasons, we delete secure mail keys whenever we have to lock or block your account. If that happens, you’ll have to create a new secure mail key for each AT&T email address

4th    / Copy your key to the clipboard and save it to notepad or any word processing application.


email accounts

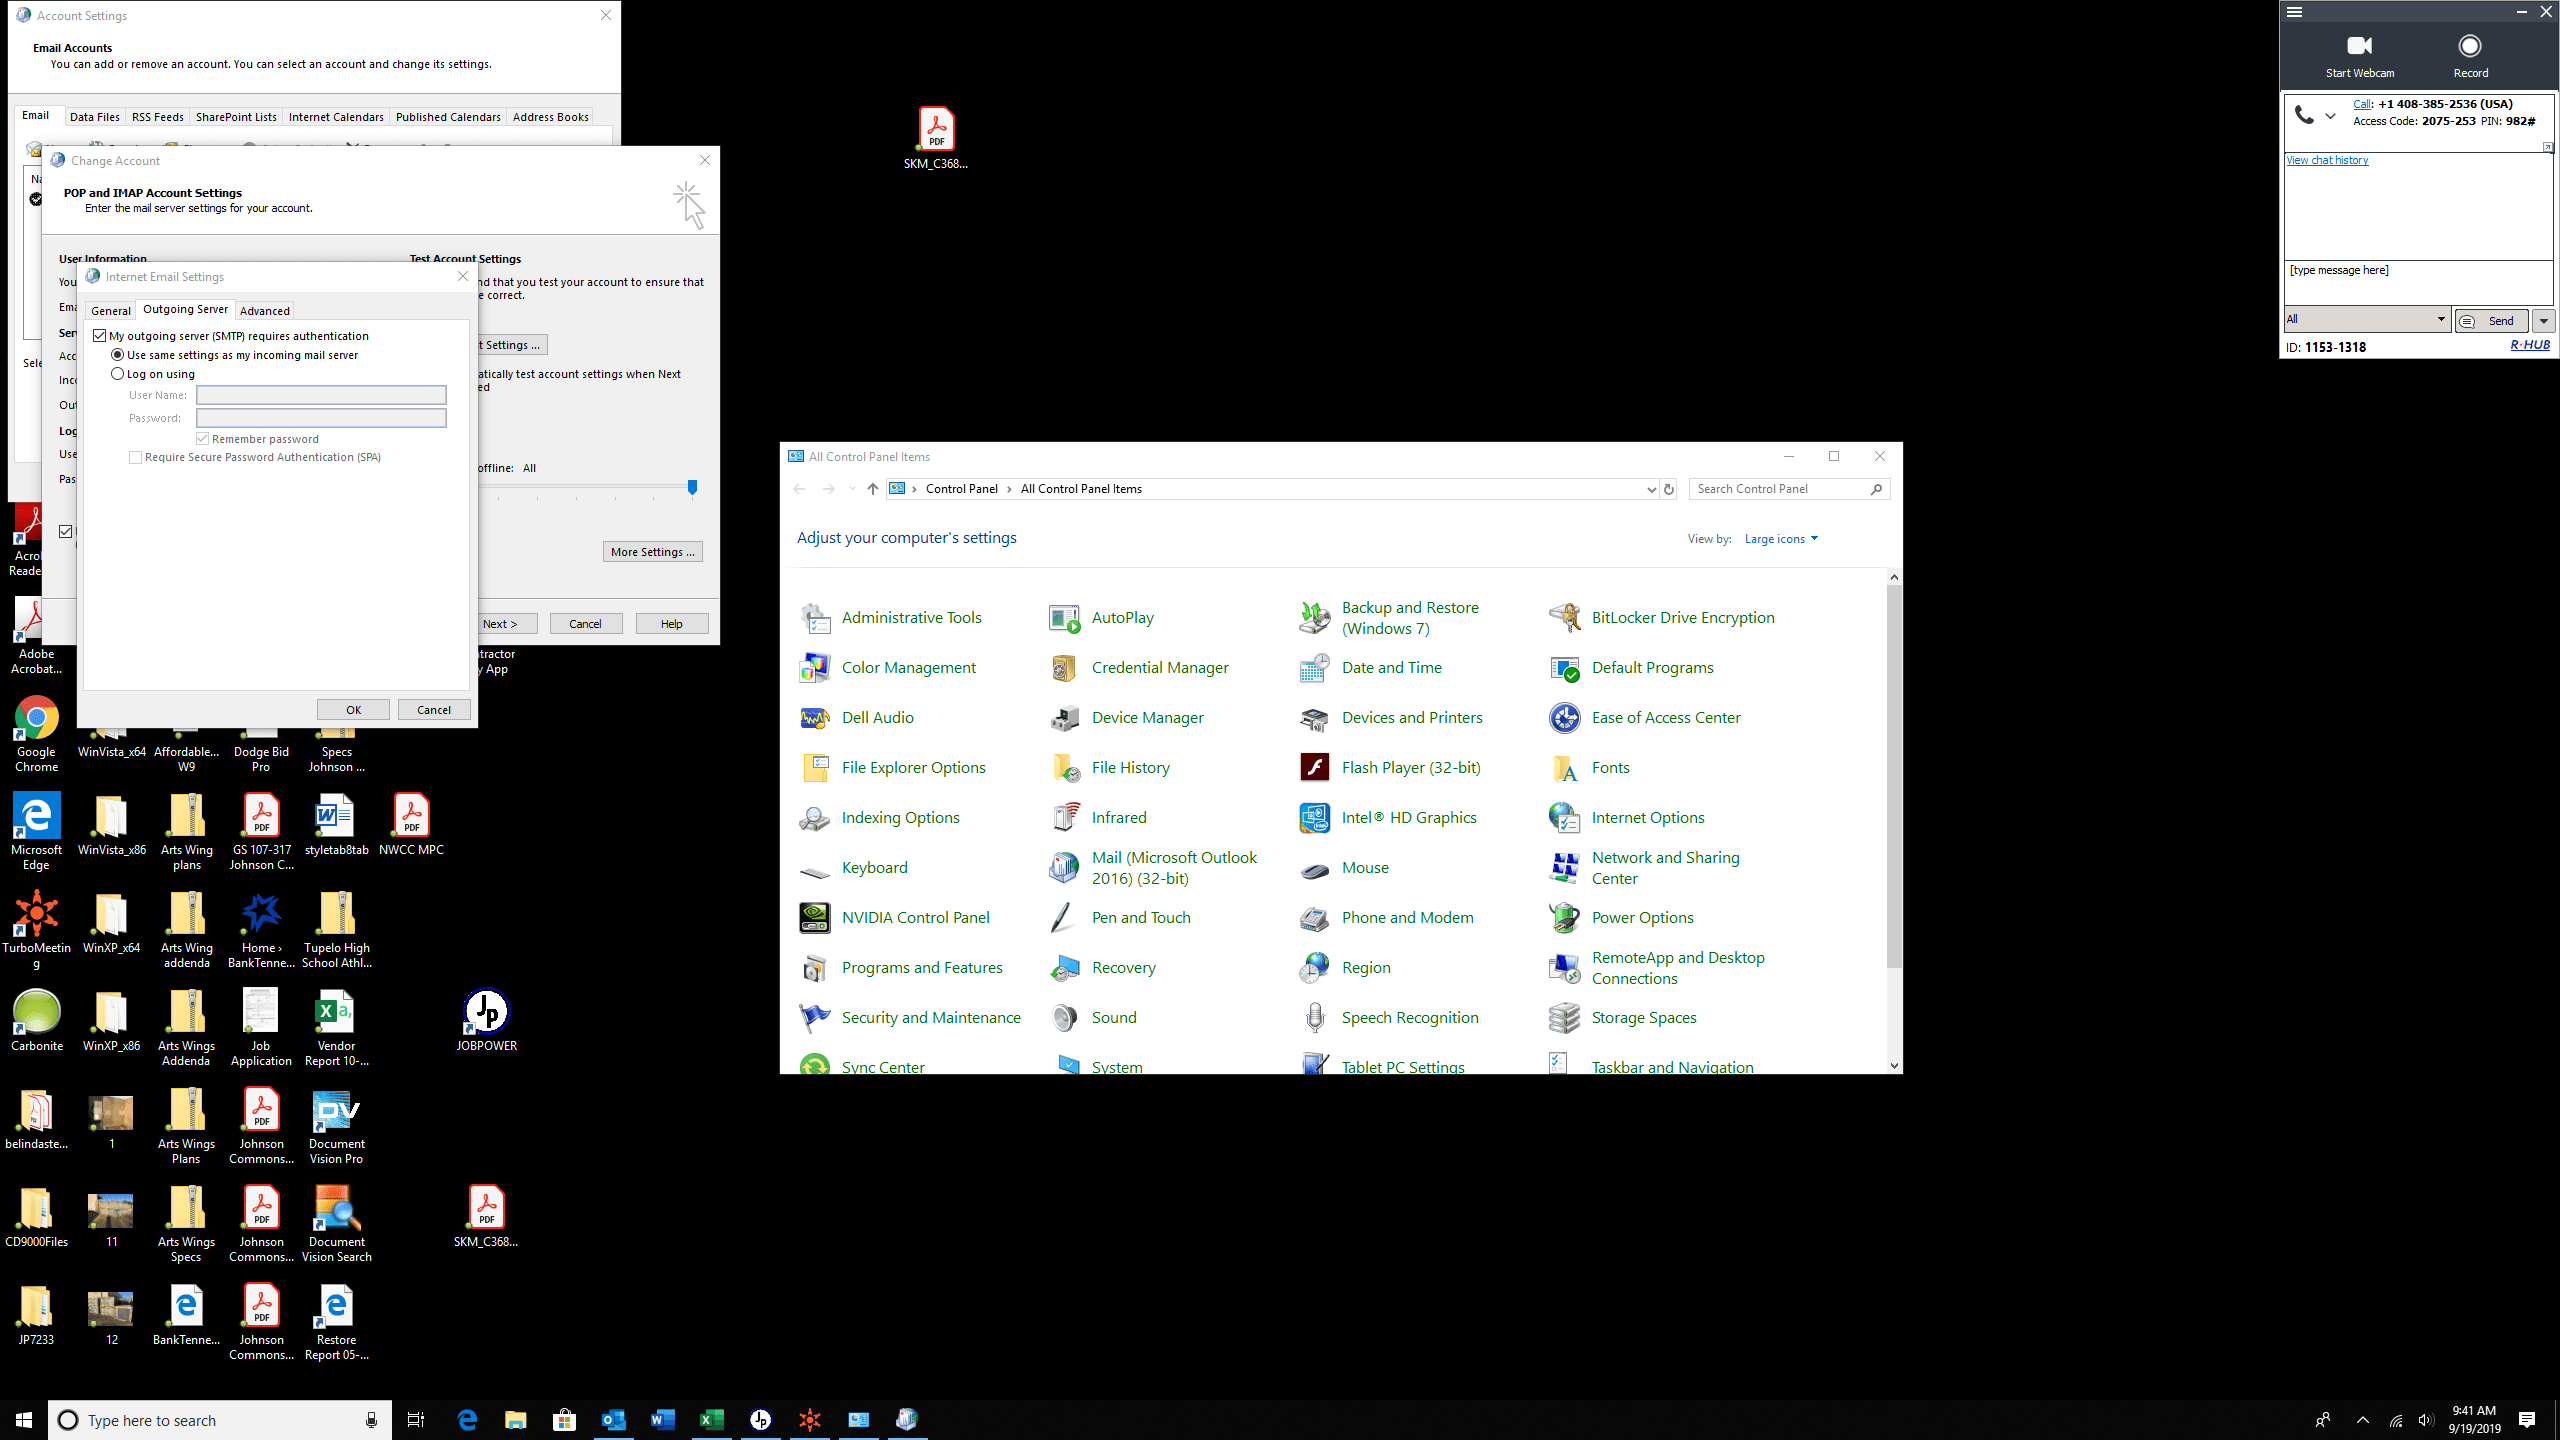
5th    / Control Panel\All Control Panel Items\ Mail (Outlook 2016) Click the email accounts button and then open the email account you need.


Your account should look like this with your info of course, and make sure you check the box for Secure Password Authentication.  And don’t forget to paste the new security key into your account password in Outlook.


Account info


outgoing ServerPorts to Use

Posted in Computers, Hardware, Laptop/Notebook, Office, Office 2016, Outlook, Security, Software, Windows

Activate XP Another 30 Days in Safemode

Boot into “Safe Mode”.  To do this, turn the laptop or PC on and press F8 as it is booting up.  Go into “Safe Mode” by choosing the “Safe Mode” option.
Once you are at the desktop in “Safe Mode”, Click “Start” then click “Run”.
At the run command prompt type the following EXACTLY

rundll32.exe syssetup,SetupOobeBnk

*NOTE: The “Oo”‘s in Oobe are “oh’s” – not “zero’s”  There is one space after rundll32.exe.  It is case sensitive as far as I know.

Click OK

Wait a few seconds – the screen may blip a few times or so.

This just reset Windows Activation for 30 days.

Reboot the PC into normal mode – log in – re-activate Windows

W269N-WFGWX-YVC9B-4J6C9-T83XG


Posted in Software, Windows

Phonetic Alphabet

Posted in Software